IVR Robo Quick Start
Robo Call IVR projects are now the standard project template for Robocalls.
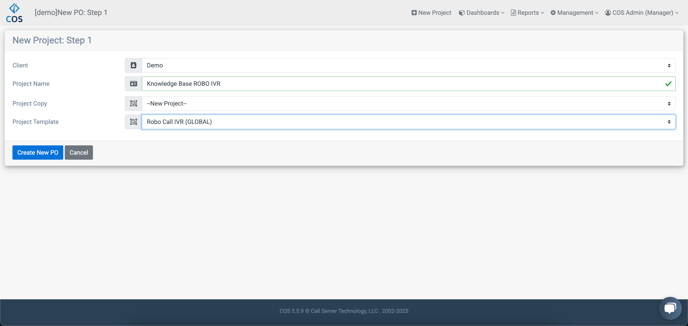
Log in to COS and Select "Project"
- Click "New Project".
- Choose the "Client" and enter the "Project Name".
- Select "Robo Call IVR" as the Project Template, then click "Create New PO".
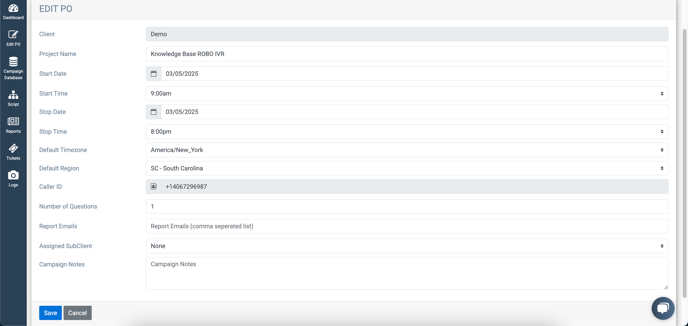
General Info:
- Select the "Start Date" and "Start Time".
- Select the "Stop Date" and "Stop Time".
- Select the "State" and enter the "Caller ID".
- Click "Save".
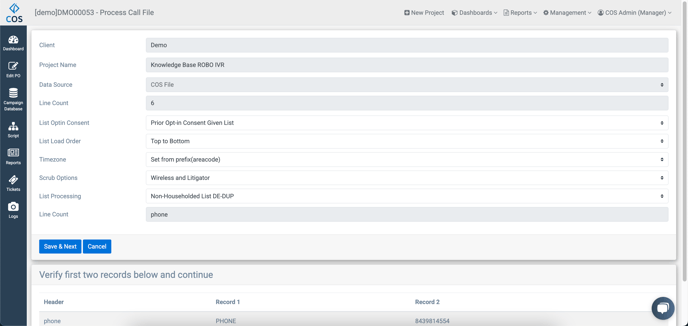
Upload The Data:
- Click "Campaign Data" and choose "Upload Campaign Data".
- Drag and drop or select the data file to be uploaded, then click "Upload".
- Choose the appropriate "List Processing" type and ensure the Phone, Name and ID fields are correctly mapped.
- Click "Save and Next".
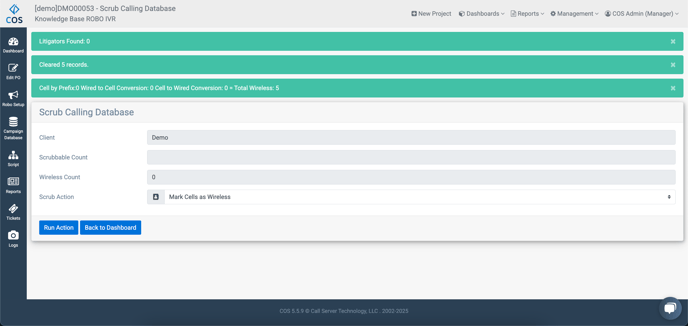
Scrub The Data:
- Select "Campaign Database" and click "List Scrub".
- Choose "Mark Cells as Wireless" and click "Run Action".
- Choose "Mark Litigator Numbers as Status DNC" and click "Run Action".
- Choose "Delete Wireless Numbers" and click "Run Action".
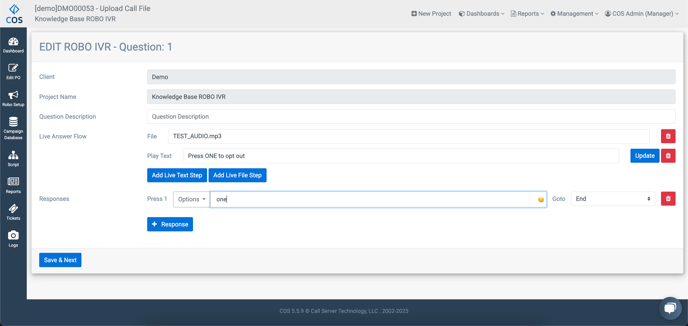
Entering The Script:
- Click "Script" and then "Add Live Text Step".
- Copy/paste or type the script into the "Play Text" field and click "Add Text".
- Click "Add Response", enter the "Response", and set the appropriate "Skip Logic".
- Refer to the client or project manager to input the correct opt out number.
- Copy/paste or type the script for the closing, then click "Save and Review".
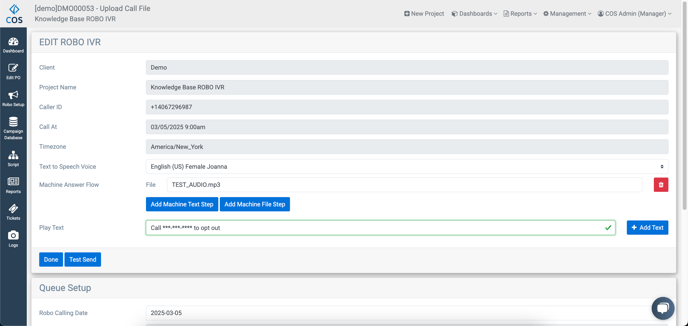
Robo Setup:
- Click "Robo Setup" and choose a voice in "Text to Speech Voice".
- Click "Test Send", enter a test number, and click "Place Test Call" to confirm the setup.
- Ensure the Start Date and Start Time are accurate in "General Info", adjusting for Eastern Standard Time.
- Click "Queue to Send" to finalize the setup.
